Follow Me!

Thursday, December 6, 2012

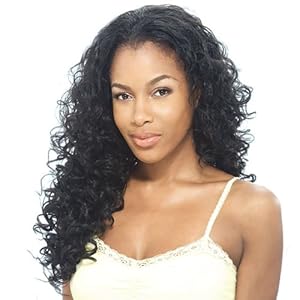
The Awkward Stage's Top 3 Half Wigs for the Half Wig Newbie


Happy Thursday yall!! :D


If you have been following my blog for awhile, you know that half wigs are my favorite protective style of choice. They just seem like the logical choice when my new growth is growing out of control.

While I have been on the wig train for quite some time, I do remember being new to half wigs an all the fears that came with that. You don't want the wig to look too 'wiggy' (too shiny, rough texture, etc.) and (this was my biggest worry) you don't want the seam of the half wig to show! These things can make someone shy away from half wigs and I totally get it.

That's why I'm here with my recommendations for good 'starter' half wigs. These wigs will not only familiarize you with the whole half wig process BUT they will give you the confidence to rock these half wigs and know that you look fly fresh to death jazzy.

My criteria for the top 3 half wigs for beginners is based on the following:

1) Blendability (yeah I know I made up a word LOL). These wigs have to be super easy for you to blend. If you can do something as simple as throw a headband on to blend or leave out a little bit of hair and brush it back, it is a good beginner wig in my book. Something that is easy and breezy, is the best starter half wig in my opinion.


2) Style. This may be my personal preference but I think half wigs with a curly sort of style to them are the best half wigs to start with. Wigs that have that straight yaki look can be a headache because you spend most of your time trying to make sure your '___weeks post' leave out blends into that wig just so. And it's frustrating. And who has that kind of time? If you can do a mini braid out on your leave out or set it on some perm rods, you increase your blendability ten fold. And we all want to make the blending process easy right? Right!


3) Day to Day Wear. I don't know if yall know this but...I love big diva like hair. I LOVE it yall. It just makes me feel so...diva. So of course, I have no problems wearing big hair. I'ont care. However, I know that everybody isn't like that and they want something that is a little bit more low key and more of an everyday wig. So for this point, I take the style/volume of the wig into account and I also determine how easy it tangles. A wig may work for everyday wear but no one wants a wig that tangles if you stare at it too hard.

Now that we have that out of the way: my top 3 newbie wigs.


1) Outre Tammy


I have to say that Tammy is my favorite half wig of all time. OF ALL TIME! This wig looks like hair that is growing out of my scalp and I get compliments on this wig every time I wear it. If I were restricted to wearing this one half wig for the rest of my life, I wouldn't e'em be mad. That is how much I love this wig. From the style (like a nice, voluminous braidout) to the texture (soft!) this wig is just amazing and I will always recommend this wig as a starting point for living the half wig life style. As you can see from the pics, this wig looks good when you take the time to blend your hair into it (for my hair, I use crimpers that match Tammy's style perfectly) or when you wear a headband with it (so for those who aren't entirely comfortable with blending yet, this is a great crutch!). It holds up pretty well as long as you take care of it and doesn't tangle much (just a little around that nape but that can be easily brushed out). I can't stress enough that this is the perfect wig for beginners!

I have more in depth reviews of Outre Tammy here and here


2) Outre Yasmine


I have reviewed Yasmine here. I find that Yasmine is very easy to blend (just leave out a bit of your hair and bump the ends a bit) and is an excellent day to day wig. Yasmine is not a huge diva like wig and is perfect for day to day wear, especially in the summer.


3) Model Model Super Mingo


Super Mingo is like Tammy lite. Really this should have been Roman number i under #1 but ...eh :shrugs: While I love Tammy, some people may find it to be a little bit too much hair. Super Mingo, in my opinon, is a scaled down looser textured Tammy and is just as easy to blend. I left out a tiny bit of my bangs, straightened, and bumped them and my hair just MELTED into the rest of the wig. I truly love this wig is it is fast becoming one of my faves.

Stay tuned for my in depth review of this wig!


Runner up:

Outre Sabina--When I turned my mom on to half wigs, this was the first wig she bought and as a newbie she loved it. She left some of her hair out, straightened and bumped it and was able to blend her hair in effortlessly. It's a wig to try but because I haven't tried it yet, it didn't make it onto the list.


That's my top 3! If you haven't tried these wigs, I suggest you go out and do so today! Right now! You'll be glad you did and you'll wonder what you were so scared of in the first place!

Monday, December 3, 2012

Wash Day: 12/3/12

Happy Monday lovelies!

I hope all of you had a great weekend! My weekend was a little hectic so I didn't get a chance to wash my hair (boo!) so I am doing that tonight.

As I have mentioned in previous posts, for a the moment I am giving my hair a break from all the heat I have been using. The frequent trimming is so not what's up. So, from now until I go to this conference I have to attend, I will be wigging it up a bit. I just thought I would post what I do on my wash days when I wear a wig because I don't think I ever described it (crazy, I know). As you guys have guessed, this is a short and snappy blog post.


Tonight, I will clarify with my KeraCare 1st Lather Shampoo (since I probably have some -cone buildup going on) and follow up with Elasta QP Creme Conditioning Shampoo. I will then DC via my steamer with ORS Replenishing condish. I will finish up by applying Qhemet Biologics AOHC and allowing my hair to air dry a bit.

Once my hair is dried enough, I will put my hair in the sloppiest cornrows you have ever seen ( I mean, no one is going to see my hair anyway. The point is to keep them braided lol) with a little bit of my bangs left out and straightened since I am wearing a half wig. My half wig of choice is: Model Model Super Mingo


I gotta say, I love this wig so far so be on the look out for a review soon! Also, I know that some of you guys may be new to half wigs so I'm going to give a comprehensive post on what wigs I think are best for newbies and my various ways to blend my hair into the wigs. Hopefully it will give you guys a little more insight into what I do and possibly give you a few ideas!

Anyway, that's it for now! I'll see you guys soon with a brand new post!

Wednesday, November 28, 2012

Wig Review: Model Model Mint Slice

Happy Hump Day lovelies!

Well, I am back yall! I finally got a new laptop and now I don't feel so...naked anymore (#firstworldproblems). Anyway, I hope all of you had a wonderful Thanksgiving. I know I did. I wound up going home to VA and went on a wig shopping spree. I finding that now that I am using more heat on my hair, I have to trim it more (I had my hair trimmed in September...then really had to do it again in November---no bueno). And I don't like that. So, I figure I'm gonna pump that breaks on the heat styling for a bit. I have a conference to attend in the middle of December and I'll probably straighten my hair then. And when I say straighten, I mean rollerset.


Anyway, I love going home to VA because I am able to get wigs that I would otherwise have to order online. Three beauty supply stores that are up the street from my mother's house carry Outre, Model Model, Bobbi, Boss, etc. As you guys can guess, I tend to go a little wig crazy when I go home. This trip, I purchased three wigs: Model Model Super Mingo, Model Model Mint Slice, and FreeTress London Girl. For the time being, I am wearing Model Model Mint Slice.


Model Model Mint Slice is a half wig that can also be worn as a ponytail (if that's what you choose to do).True to this function, Mint Slice has 3 combs: one lonnnnnnng comb in the front and two smaller combs in the back. However, it also has a drawstring in the back for tightening the wig a bit or wearing it as a ponytail. Mint Slice is a synthetic half wig and heat cannot be used on it. I purchased Mint Slice in color 1B and found that it is pretty much true to color. The style of the wig reminds me of FreeTress Samara Girl but only with a looser texture and slightly more layered. This hair has a lot of volume and is very long (the wig is layered but the longest length is MBL-ish) which means that this wig is a lot of hair! However, it definitely makes me feel very diva-esque.


While I like this wig, I really don't like the fact that this wig tangles easily! You have to be very careful in separating the curls or else you'll get a frizzy, tangly mess. For this reason alone, I don't see this wig lasting longer than a month with everyday wear. This wig is also pretty snug so for those who have bigger heads and they may find this wig uncomfortable. However, I do like that it is easy to blend. I simply straightened a small section of my bangs an proceeded to blend. If you're looking for a heat free way to blend, simply setting your hair on some perm rods will do the trick.

Bottom Line: Model Model Mint Slice is a decent half wig for the price ($25). I think that this would be an excellent wig for half wig newbies to wear since it is so easy to blend. However,I see it more as a special occasion wig rather than an every day wig. Either way, give Mint Slice a chance. You won't be disappointed.


Monday, November 12, 2012

My Hair is Straightened..Now What?

Happy Monday lovelies!

I have to let you guys know off the bat that my posting will be kind of spotty for awhile (hopefully no longer than a week). My laptop died after 4 years of faithful service this past weekend. So now, I have to wait until I go home to get one. Therefore, my posting will be based on when and if I can get to a computer.

Now that we got that out of the way....


Y'all know how it is when you get your hair straightened. Your hair is flowing in the wind. You're slangin it every which way...y'know whippin your hurr back and forth.

And you do this for a day or two. Maybe even four. Then it happens.

Your hair begins to revert. If your hair is anything like mine, this reversion begins in the center of your head at the roots. As a result, your hair as a little volume to it. Maybe a little too much considering that the rest of your hair is bone straight. I don't know about you but I don't like looking like an extra from Dynasty or Dallas (the 80s one, not the recent one)

So what do you do?!? WHAT DO YOU DO!?

Well, one option may be to run to you flat iron and 'touch up' those roots. However, this option may not be the best in the long run. Repeatedly putting too much heat on your hair? No es bueno. You gotta learn how to work with your rebelling hair. Your hair isn't gonna be straight all the time. Thems the breaks. However, I do understand that you may not be ready to hide your hair in a bun. Sometimes, you just want to wear your hair out for a week or two. Trust me, I get it.

So what are your options?

1) Bantu knot out...kinda

Something I do once my hair begins to revert is to put my hair in 2 or 4 large bantu knots (the number depends on how curly I want my hair) before I go to bed at night. In the morning, I unravel them, creating a bantu knot out of loose curls. I find that when I do this, it gives me a few extra days to wear my hair out. Also, this is a good option for the ladies that work out. Put your hair into bantu knots prior to your workout session and you still have a cute style afterwards. However, this may not work if you sweat in your hair a lot. In which case, I don't know what to say about that. If you follow me on twitter or Instagram (sweetesttaboo85), you saw this style on me late last week. I absolutely loved it!

2) Flexriod set it

Another option for generating curls if you don't mind sleeping on flexirods. For this, I typically apply a little moisturizer, find the largest flexirods I can find, and commence to rolling my hair. For this I typically have no more than 6 flexirods in my hair since sleeping in them is a pain in my behind. However, this again gives you some more wear out of your hair as it goes about its reversion process. Remove the flexirods in the morning, fluff your hair, and be on your way!


3) Braidout

If you somehow wound up straightening your hair during the summer (or even during the winter), doing a braidout on reverting hair is a great option as well. Again, it allows you to mask those reverting roots while giving you a cute summery hairstyle.


That's it. Those are the three styling options I cycle through before I decide to put my hair in a bun or a Gibson tuck or whatever until my next wash day. They still allow you to wear your hair, gives your hair a little variety, and allows you to enjoy your hair!

Do you have any ways to extend your blowout that I missed? I would love to hear them!!

Monday, November 5, 2012

Fall 2012/Winter 2013 Hair Regimen

Hey there once again lovelies!

As I was washing my hair this past weekend, it totally dawned on me that I haven't shared what I plan to do with my hair now that the weather has cooled down (finally!).

I really want to take the time to enjoy my hair. I've been growing my hair out all these years and have been hiding it. And that's no fun for anyone. I mean, I've gotten me some bangs and have my hair layered...I need to wear it out dangit!

The game plan is this: I will straighten my hair 2x a month. 2 weeks out of the month I will wear my hair out and 2 weeks I will bun. I will only use heat on the days I straighten my hair (except if I have to touch up my bangs). I figure this particular regimen gives the perfect balance of heat use.

Since I will be using heat, I have to modify my regimen a bit. When using heat, I am a firm believer of 'you got to put in what you take out.' This means I have to keep my protein/moisture levels in check! I plan to do this by using great DCs and steaming.

So here is what I plan to do:

Wash Day
--Hot Oil treatment with Kemi Oyl or Jamaican Black Castor Oil

--Wash with Elasta QP Creme Conditioning Shampoo or Mizani Thermasmooth Shampoo ( I will clarify my hair as needed with ORS Creamy Aloe Shampoo)

--Apply ORS Replenishing Conditioner or Aubrey Organics GPB to my hair

--Steam hair for 30 min

--Blowout using Mizani Thermasmooth Serum (Step 3)<--will wait until hair is 80% dry via air drying --Flat Iron using Beyond the Zone Heat Protectant **Will wrap hair nightly for 1 week. Prior to wrapping, I will moisturize using KeraCare Cream Hairdress and will seal ends using Kemi Oyl** **My hair will stay wrapped as long as I am in my apt** **Will not use heat to 'touch up my hair.' The only exception is for my bangs** Week 2 I will bun my hair, moisturize as needed, and leave my hair alone until wash day. Soooo..as you can see my regimen is pretty simple. As I get further into my stretch ( around 12-15 weeks post or so), I will incorporate wigs into the regimen if I don't feel like stretching. I'm really excited about this regimen and I am curious to see what effect this will have on my hair!


Thank the LAWD for Anti-Humectants!

Happy Monday lovelies!

Can you believe it's November already? 2012 has really flown by!

Anyway, for autumn and winter, I have resolved to straighten my hair 2x a month (wear my hair out and straight for 1 week, bun the next, wash, repeat). I gotta learn how to enjoy my hair more..otherwise, what am I growing it out for?

In the past, the biggest issue for me and straightening my hair was reversion. My hair would be straight immediately following a blow out but then..when I stepped outside with my locks a flowin'...that moisture would hit my hair,my hair would say 'haaaayyyy boo,' and then puff up.

It's extremely frustrating. Hours of work down the drain in a matter of minutes.


Recently, I found a way to prevent that: anti-humectants. Simply stated, anti-humectants block moisture from your hair (so you really have to take care to get the moisture you need to your hair BEFORE you apply this product). They are typically silicone-based so if your hair is sensitive to cones, take heed. All you have to do with anti-humectants is apply a little to your hair post flat ironing and BAM! Sleek hair!

I have only tried 2 anti-humectants thus far and they are:

Fantasia IC Frizz Buster: Now I have had this particular bottle of Frizz Buster since the beginning of my journey. I tried using it as a heat protectant and I don't recall being too thrilled with it. Recently, however, I have been using it as an anti-humectant. I LOVE it! I can get a good week of wearing my hair straight with minimal reversion using this product. I also love how it's readily available (you can find it in Walgreens, CVS, Rite Aid, Target, etc.) and relatively inexpensive (costs about $8 or $9+tax). Make sure you get the serum and not the Frizz Buster in the jar though.

Mizani Thermasmooth Shine Extend Anti Humidity Spritz (Step 4): Now if you have been following my blog for awhile, you know that I have sung the praises of Mizani Thermasmooth from the highest of mountaintops. I love that system for straightening. I really do--just the first 3 steps though. I have not been impressed by this spritz. I just think my hair needs something heavier (like a serum) and not liquid-y to keep it from reverting too quickly. When I use this spritz, I get a day or two of sleek hair and then it's back to light and fluffy. This is the only step of the Thermasmooth system that I'm 'meh' about.

I really REALLY want to try:

Aveda Brillant Anti Humectant Pomade: The innanets have been singing thee PRAISES of this pomade....so you know I have to try it! It's a little pricey ($20) but I must try it! I've just been to lazy to go to the Aveda store to get it.


Bottom Line: Get a good anti-humectant! You won't be sorry!

What anti-humectants have you tried?


Monday, October 22, 2012

Look of the Day 10-22-12: Textured Bun

Happy Monday lovelies!


Soooooooo....that flexirod set I did this weekend was a TOTAL bust. Even after separating the curls, I looked like I was ready to board the good ship Lollipop and that simply was not gonna fly.

Typically, when I have a failed braid out or bantu knot out, I immediately put my hair into a bun. I actually like having some texture to a bun. It makes my hair look messy but neat (if that makes any sense lol). Anyway, check it out!


Sunday, October 21, 2012

Sunday Chat: Have You Ever Just Wanted...to Say Something?

I know what you're thinking and yes, I am actually posting a Sunday Chat on a Sunday! Let's clap it up for that! * claps*


Now...on to the topic.

Giving unsolicited hair advice is always a tough thing for me. In my day to day, I see so many women whose hair is just beyond damaged and dry and whatever else adjective you can think of. Oftentimes, they will talk to me about hair their hair and how it is so difficult to do anything with it and really just ponder cutting their hair off. Meanwhile, I'm sitting there thinking "Well if you would stop relaxing it every time a curl pops up and moisturize it a bit, you'd be ok." But folks ain't trying to hear me though.

Once upon a time not long ago, when people wore pajamas and lived life slow, I actually tried to give hair advice that wasn't necessarily asked for. The response I got to my advice? "Well I don't have good hair like you."

o.O

Whatever.

So from that point on, I stopped giving advice that wasn't asked for. However, sometimes it's hard not to when you see that someone's hair is so damaged. I just want to be helpful and present some options they hadn't thought of. Instead, I have to just sit back and wait for those folks to come to me and asked their questions.


How do you deal with wanting to give advice? Have you ever received hair advice that you never asked for?

Wash Day 10/20/12 Or "Why I Stopped Doing Flexirod Sets In The First Place"

Happy Sunday lovelies!

I hope all of you are having a great day thus far. Right now, I'm currently in lab but I have some down time to update this here blog (I know, exciting right?).

Yesterday was my wash day. This particular was day was different because I decided to actually *DO* something to my hair. Any other wash day typically ends with my hair air drying in a ponytail or bun only to be placed in a bun. Not this time! I was going to enjoy my hair! Since I straightened my hair last week and really didn't feel like going through that whole process again, I decided to flexirod my hair.

Now, the last time I flexirod set my hair was AGES ago! I had to be SL the last time I did a set but since I have the large rods, I figured that I can give the rod set a go. As per usual, I washed my hair with Elasta QP Creme Conditioning Shampoo. I then slathered on some ORS Replenishing Conditioner and steamed my hair for 30 minutes. Then I began to flexirod my hair.

Here is what I used:


I used Jane Carter Solution Revitalizing Leave In for....my leave in (lol). I then sectioned my hair into 4 sections and then sectioned those sections into 3 sections. For each of the smaller sections, I saturated my hair with Kinky Curly Spiral Spritz. Typically, when I do flexirod sets, I like to use products that will provide hold but won't make my hair crunchy. So, if I didn't have any Spiral Spritz available, I would have used a super diluted setting lotion (foam, liquid...it doesn't matter). Anyway, I then place end papers on my ends (some people don't do this, though) and proceeded to put the rods in my hair. In total, I used about 17 flexirods and it took me around 20 minutes to set my hair.


After that, I got under my dryer. That raggedy behind Conair.

Then I remembered why I stopped doing rod sets.

I hate that damn dryer.

I sat under that thing for 2 hours. 2 HOURS Y'ALL!! And my hair still wasn't dry. There were some sections that were. But the back? Nah they weren't dry. In fact, there is a section in the back that still isn't dry as I type this. The rods around the perimeter of my hair? Nope. 2 hours and it was like nothing happened. I had to eventually get from under the dryer because I eventually blew a fuse and figured it was a wrap for that. So I went to bed. Woke up. And got back under the dryer this morning.

Long story short, my hair ain't completely dry but I didn't have all day to sit under the dryer...I have things to do. However, I realized that I stop doing flexirods because the dry time is ridiculous! I just don't have 2 days to etch out just to dry my hair! It's time for a new dryer man smh.

However, I do have pics of the sections that are dry:


Now, I am not going to leave my hair like that! I still have to separate my curls but will do that tomorrow before I head to lab.

Anyway, what did you do to your hair this weekend?

Friday, October 19, 2012

Look of the Day 10-19-12: High Bun w/ Bangs

I guess you can call it my Evelyn inspired high bun. I guess.

Last wash day, I wound up straightening my hair. After wearing my hair out for a few days, I was itching to get my hair back into a bun so that's what I did. Since brushing my bangs back into a bun is more annoying than words can accurately describe, I decided to leave them out. As for the bun itself, pretty much just gathered my hair into a ponytail and messily pinned my hair down to make the bun. So far, I'm loving my hair like this! I think the bangs add some oomph to my basic, boring ol' bun.

I snapped the best pictures I could w/ my camera phone buuttttt, I think it it gives you guys the general idea of what I have going on...


Oh and Happy Friday everyone! I hope you're having a great day! :D

Monday, October 15, 2012

Sunday (More Like Monday) Chat: Hair Boredom

Happy Monday loves!

I know I took an extended hiatus from the blog..this was mainly due to school stuff ( had a big committee meeting to prepare for). However, the other contributing factor was that I was simply bored with my hair.

I'm finding that as I go along this hair journey of mine, I don't really like hair that is only long and straight. With no style, it gets kinda boring to me and as a result, I wind up feeling how my hair looks: dull and boring.

Well...what do you do when you're on a hair journey. I mean, you want to grow your hair out..that's the goal. So, you have to fight against the temptation to cut it super short. Most folks my color their hair but that's really not my style. SO WHAT'S A GIRL TO DO??

I'm gonna tell you what I did.

I cut my hair.


Relax..I didn't cut it cut it. I just got some bangs...and some layers cut into my hair while keeping the length. My hair looks so much more interesting now...and not so...meh. Take a look:


Oh...try to disregard those grays in my hair LOL.


What do you do when you're bored with your hair? Is this par for the course for any hair journey?

P.S.--Hello to all my new readers!! Thank you so much for taking the time to read my blog!

Monday, September 3, 2012

What Am I Doing With My Hair Nowadays?

Shoot, what am I doing with my hair these days?

Well, I have not relaxed my hair since May and am currently around 17 weeks post or so. I don't have any plans to relax my hair soon. It's still pretty warm around these parts and I don't see the point in relaxing right now if I'm only going to bun and not wear it out. When I relax, I want to wear my hair out and have it flowing in breeze...I guess it ain't time for that right now. Don't fret though. I will relax before the year is out.


I'm pretty much leaving my hair alone. I wash it and DC once a week and I recently started keeping my hair braided while wigging it up again! For awhile, I was rocking Outre Yasmine. However, I got really tired of trying to blend my hair with it. It got to be too much work. I didn't want to flat iron then curl my hair every single day nor did I want to rock a headband every day. Soooooo....I tiptoed my way over into full wigs. My first full wig is FreeTress Bali Girl. Although I will be doing a full review of her, let me say that I love this wig! I think it's a great will for those experimenting with full wigs for the first time. Check it out:


Cute, huh? I will be wigging it up until I relax (which may be in late October/early November time frame). At that point, I will show you guys a length check and we can all see my progress for 2012!

(A Somewhat Late) Sunday Chat: Natural Hair Product Explosion--Is It Good or Bad?

Yes I know.

It's not Sunday.

Let me explain. For the holiday weekend, my family converged on my grandparents house in SC (which was great fun!). My grandparents live in the country and while they do have internet, they have dial up...so yeah. Y'all see what happened with that lol.

Now that I'm back in B'ham, I can post what I wanted to chat about. I was in the BSS a few days ago and I noticed a SLEW of products now geared toward natural haired ladies. Organic Root Stimulator has the Curls Unleashed line, Motions as well as Dr Miracles (which is a terrible line in general so why they are expanding into the natural line of things is beyond me) have their natural lines. I also stumbled upon a new line called As I Am (which seems like an interesting line). I know I'm probably missing a few but the point is, there are a lot more mainstream products geared toward natural ladies now than there were a few years ago.

On the surface, this seems like a great thing. I love how there are now more mainstream products that are readily accessible (meaning that you can swing by your local CVS, Rite Aid, Walmart,etc and grab a product). This also gives more variety in product and (in my opinion) it makes going natural an option for some folks because they can actually see the products geared for their hair (I've gotten the side eye IRL for mentioning a product I ordered offline...so yeah) and going natural becomes that much more feasible.


However....

A thought crossed my mind as I bought that $15 bottle of As I Am moisturizer, what if this product explosion is NOT a good thing? A lot of these newer natural hair care line cost quite a bit of money (A jar of As I Am moisturizer was $25, the Curls Unleashed line has products that start at around $14) yet their ingredients don't justify the cost. I have no problem dropping money for lines like Qhemet Biologics, Darcy's Botanicals, Hairveda, and the like because their products are all natural and to make them does cost a bit. I have a problem with spending a lot of money on a product that is mostly filler. That product probably cost $2 to make and you want to charge me $20+ for it!? Get out of here. To me, that screams that these companies are trying to jump onto a trend. There are a lot of black women who are natural or who are starting to go natural and these companies are trying to capitalize off that. Therefore, it is entirely possible that they are pushing a crap product in order to increase their bottom line.

While the growth of natural hair products makes me happy, it worries me at the same time. What do you think about this natural hair care product explosion? Is it good or is it bad?

Thursday, August 30, 2012

Let Me Show You How To Stretch: Taming the Beast

In the Let Me Show You How To Stretch series, I will not only cover the benefits of stretching but I will cover ways to deal with your hair during the stretch-from moisturizing to general handling to styling.. This series may be extremely beneficial to stretching newbies, those who want to extend their stretch, and those who are considering transitioning.


It's Thursday yet again and I am back with another post in my relaxer stretch series! This post will cover general handling of hair during long relaxer stretches. I have to admit, most (ok, all) of it may sound like common sense BUT I have to emphasize the importance of the tips I am going to mention. Stretching for long periods of time can be frustrating and if you are committed to long term stretching, you need to do everything you can to ensure that it is successful.


Most long term stretchers will tell you that the key to having a long term stretch is basically leaving your hair alone. I have to say that I agree. However, that doesn't mean completely neglect your hair...it just means that you don't need to be in it ALL THE TIME! But what about the times when you are in your hair? What about when you're trying to get your hair to behave? What do you do then? WHAT DO YOU DO!?

During a stretch, the only time I am in my hair is during wash day. Outside of that, my hair is in a set style for a week. However, I still have to deal with my mass of hair on wash day and that can be a chore. Here is what I do during wash day:

1) I do everything in sections.

This is an absolute must for me. At start of my wash, I put my hair into four plaits...and that is how I proceed for the duration. I shampoo in sections, I DC in sections, I detangle in sections. If I don't do this, my hair becomes way too much to deal with too fast.

2) I detangle at every point in the wash that I can.

I had to learn this lesson the hard way. The deeper you are in your stretch the more effort you must make to detangle your hair. I'm talking about detangling from the moment water hits your hair until the moment you have set your style. Otherwise, you could find yourself in the middle of a tangled mess.

If I follow those 2 rules, my wash day is pretty smooth for the most part. However, what about general handling? What about combing? What about slicking your edges down once they start looking natural? No worries. Here are my tips:

Combing: It is a rule of mine during a stretch to not comb my hair if its dry. Therefore, my detangling/combing occurs on wash day. It is a lesson I have been following since childhood and I pass it on to you. You better not try and run a comb through 15 weeks post hair that is dry...you will regret it. However, if you absolutely, positively must comb your hair, try and grab a spray bottle of water or load your hair with moisturizer or a leave in conditioner before you do.

Slicking down hair for buns: This can probably be the most frustrating part of stretching. Everyone's go to hair style for a stretch is a bun. However, getting a slick,sleek, smooth bun at the height of your stretch can be difficult to say the least. However, there is a solution for that...the scarf method. The scarf method has given me the sleekest buns every.

But what about dem edges?

If your edges fight any attempt to be tied down, put some moisturizer, oil, and some Ecostyler Olive Oil Gel on your edges and tie them down with a scarf for about 15min. Your edges never stood a chance.

Other than those key things, I cannot stress enough how important it is to LEAVE YOUR HAIR ALONE!!! Find the style that requires minimal interference from you during the week and call it a day. The more you find yourself in your hair, the more you will battle the new growth and the more frustrated you will be. My rules are simple but they allow me to get through these long stretches without really thinking twice about it. Hopefully, they help you all too! Stay tuned for styles that aid in a successful deep stretch.

Sunday, August 26, 2012

Sunday Hair: We Have To Look Good To Play Sports Now?

Happy Sunday lovelies!

This Sunday chat is coming in a little late this evening. I had to pretty much work a full day in lab today so my time wasn't my own. But I'm here now! :throws confetti and smiles:


So today's Sunday chat has been prompted not only by the whole Gabby Douglas hair debacle during the Olympics but just the criticism of female athletes hair while they are actively competing. Honestly y'all, I don't understand the criticism. However, I may be looking at things from a different viewpoint.

When I was growing up, softball was my sport. It was a sport I absolutely loved. I loved playing the game, being on the field, everything. Aside from cheerleading, softball is probably the only sport that brought me joy (SN: I am the black sheep in a family full of basketball players. I understand the game completely but I wouldn't play it even if you paid me). While I played many positions in softball, my main position was catcher. So not only did I have my uniform on, I had that hot behind catchers gear on too--which unearthed a whole 'nother set of problems. Looking back, however, my hair was the LEAST of my worries. Like my teammates, my main concern was was fitting my hair underneath my cap and keeping out of my face (read: I put my hair into a ponytail). Being cute just didn't register when we were practicing and trying to win games. And if someone would have told me my hair looked jank whilst playing a sport, I would have hit them with the blank stare because I looked no different than my teammates.


So when did having great hair become a requisite for playing a sport? Why does it even matter? These questions cross my mind every time I read an article about sports and hair or even open a thread on a certain hair board where folks are clowning an athlete's hair. I would think that given the context, that falls last on the list of priorities. Additionally, it makes me sad to see that the bulk of the commentary coming from African American women. I feel that commentary like that adds to the stereotype that we would rather be overweight w/ banging hair than healthy w/ so-so hair.

Anyway, what are your thoughts about this? I'd love to hear them!

Thursday, August 23, 2012

Let Me Show You How To Stretch: Moisturizing Your Situation

In the Let Me Show You How To Stretch series, I will not only cover the benefits of stretching but I will cover ways to deal with your hair during the stretch-from moisturizing to general handling to styling.. This series may be extremely beneficial to stretching newbies, those who want to extend their stretch, and those who are considering transitioning.


Happy Thursday lovelies!!

I hope you're having a happy and productive day so far. This post was inspired .by a question I saw recently on LCHF about stretching...and my general lack of discussion about stretching even though I post about my own trials and tribulations regarding stretching. Honestly, styling your hair and the benefits of stretching are the focus of most stretching posts while caring for your new growth and dealing with the frustration that is stretching is primarily overlooked. Yes stretching is great and everyone should do it but try tell that to someone who is used to relaxing every 4 weeks...you gotta be prepared to tell them how to deal.

Well, I'm going to remedy that. I'm going to try and address one of the most basic of stretching concerns: dry, puffy new growth.


Personally, I am a long term stretcher. I never intended to be...I just lose track of when I had my last relaxer and when I look up, I realize my last relaxer was months ago. I typically relax at 20 weeks and my hair has thrived. Contrary to the myth, no your hair will NOT break off if you don't adhere to a rigid every 6 to 8 weeks relaxer schedule. However, your hair will break off if you don't care for it.

Every stretcher can attest that when the new growth comes in, it's pretty dry. Keeping your hair, especially your new growth, moisturized is essential to a successful stretch. How do you do that? What products do you use? How do you know it's working?

What products do you use?
The deeper you get in your stretch, the more you need to incorporate super moisturizing products-starting with your shampoo. The deeper I get into my stretches, the more I begin to reach for the products whose sole purpose is giving moisture. Choose a moisturizing, sulfate free shampoo (Elasta QP Creme Conditioning shampoo and Shea Moisture Moisture Retention shampoo are my picks) and follow up with a moisturizing DC (ORS Hair Repair, Silicon Mix, and Aubrey Organics White Camilla are all good picks). It is also great to have a good moisturizer (Darcy Botanicals and Qhemet Biologics AOHC are great choices) handy.

What's the technique?
For a successful stretch (especially for newbies), I think it's important to approach this whole moisturizing thing as something that needs to be done throughout your regimen rather than thinking you need to moisturize at one step, post wash. Additionally, long stretches really require special (almost obsessive) focus on the new growth. If you start with a sulfate free shampoo, you are cleaning your hair (new growth included) without stripping your hair of the moisture it needs-which is a good thing and a great starting point for your stretching regimen. The next step in keeping your new growth moisturized and happy lies in a moisturizing DC. It is important to apply this DC directly to your new growth (yes, this takes a little bit of time to do. Having a moisturizing DC will not help if you are only applying it to the length of your hair. Finally, if you choose to use a moisturizer, it needs to be applied directly to your new growth as well. I've found that when stretching, you really have to pay attention to and baby your new growth. You can't just slap on a product to the length of your hair and think everything is going to be all right. On the contrary, you will have a big ol' mess and will want to run for the relaxer the first chance you get.

How do you know it's working?
It's pretty easy to determine the success of your moisturizing technique. When my new growth is well moisturized, my new growth takes on its natural curl pattern instead of being puffy. It also feels moisturized (instead of dry) and is easier to comb through (should the need to comb arise).

Those are my tips for upping your moisture game during the deepest of stretches. Is there a point I missed? If so, let me know in the comments below!

Wednesday, August 22, 2012

A Product Revisited: Wild Growth Oil

If you’ve been following my blog for awhile, you will know that I’m going through a product purge of sorts. I admit that I am a recovering product junkie and now I have a cabinet full of products that I need to use or toss…and soon. Products typically have to wow me within the first few uses and if they don't...I can't be bothered. Right now, I'm really trying to streamline my products and having 50-11 products around at any given time isn't helping matters. Therefore, I am revisiting them. I'm finding new uses for them, making definitive decisions on their place in my regimen, confirming/disproving what I initially thought, and giving you guys a mini review in the process. :)


A product that has found its way back into my rotation is Wild Growth Oil (white label). I remember purchasing it at the start of my journey because I heard so many raves about it. However, I stopped using it because that oil stinks like all to be damned! I just couldn’t deal with it. It also didn’t help that the term ‘wild growth oil’ is a misnomer. Back then I was applying the oil to my scalp weekly and I didn’t notice any ‘wild growth.’ That plus the awful smell resulted in that little bottle of oil finding a permanent home in my bathroom cabinet.

Lately, I have been using Wild Growth Oil as a sealant following my wash and DC sessions. I mainly apply it to the length of my damp hair and air dry. Fortunately, the fishy smell from the oil dampens down considerably as your hair dries (I find the smell is most potent the day of application and you can barely smell it following that). Since I use it as a sealant, I'm finding that it helps to keep my hair moisturized. I last washed my hair on Saturday and, as of Wednesday, my hair is STILL moisturized. It also helps with any tangles I get in my hair. Bottom line, I love this oil as a sealant but I would only use it on damp hair.

This oil can also be multipurposed. I add a few drops to a DC, a hot oil treatment, and use it (with a combination of other products) to slick down my edges. I find it to be a solid product for those uses as well. However, I wouldn't say that Wild Growth Oil needs to be an absolute must in your regimen-especially if you have oils that work for you currently in your rotation. If you are like me and currently have the oil sitting in a cabinet collecting dust, it can definitely add some oomph to your reggie if you give it a chance.

I'm still on the fence as to whether or not Wild Growth Oil has earned a permanent spot in my regimen but as of right now, I am pleased with the results I have gotten from it.

Want to check it out for yourself? Here's a brief rundown of where you can get it and what's in it:

Price: $8.00+ tax for 4oz (at Sally Beauty Supply)

Ingredients: Olive oil, coconut oil, jojoba oil, oleic acids, triolein, arachidic esters, flavonoids, monolaurin, capric acid, monocparin, long chained monohydroxyl groups, pro vitamin A, pro vitamin E, natural vitamin D, squalene, terpenoids, hydroxytyrosol, oleuropein, the aglycone of ligstrosides, (=)-1-acetoxypinoresinol, pinoresinol, chloropyll, carotinoids, choline, iron, magnesium, phosphorous, calcium, natural fragrance and natural color.

Sunday, August 19, 2012

Sunday Chat: Products That Aren't Worth The Hype (Or The Price!)

Happy Sunday lovelies!


This particular Sunday Chat came from my recent experimentation with Miss Jessie's products. I was able to acquire a few free samples of the Super Sweetback Treatment, Curly Butter Creme, and Curly Meringue. Thus far, I have tried everything except the Curly Meringue.


And I am not impressed.


To start, these products smell sickeningly sweet. You are just overwhelmed with scent from the moment you open the packet. Then, for all that scent, the product performance is just...meh.There really wasn't anything about them that would make me run out and buy them.

Thank goodness I used free samples otherwise I would have been extremely upset. If you aren't familiar with Miss Jessie's products, just know that they are hella expensive! 16 oz of product can run you $48! $48 for a product that is made out of the same ingredients of most of the products seen in the ethnic hair care aisle in Walmart.Based on my experience with them, Miss Jessie's isn't worth the price.


Earlier in my hair journey, I had the same experience with Carol's Daughter. I fell for the hype of the product line and thought it would be the answer to my hair woes. Unfortunately, that was not to be. Those products cost way too much to not do anything for my hair.

But, it makes me wonder. How many of you had experiences with products that were overhyped and overpriced? Why did those products ever receive the hype in the first place?

Sunday, August 12, 2012

A Product Revisited: ORS Olive Oil Smooth N Hold Pudding

Happy Sunday lovelies!

I hope all of you are having a great day! Yesterday, I was combing through the product graveyard that is the cabinet space under my sink. As of late, I have been making an effort to use up most of the products under there and so far it is working. I have slightly more space under there than I had previously. Anyway, while I was combing through all those products, I stumbled across a half full container of ORS Olive Oil Smooth N Hold Pudding.


Let me tell you about this product, when I first purchased it, I was was blinded by the word 'gel' in the product description. Well actually, it was described as a moisturizing gel (whatever that means). With its creamy consistency, I thought it would be a great alternative for gel. And since I'm always on the lookout for a good gel or gel alternative, I had to give this product a try.

Boy was I wrong about that.

If you've been following this blog for awhile, you know I likes a good gel/gel alternative to slick down the edges. So naturally, that is what I used the Smooth N Hold Pudding for...as a gel for my edges. I applied the product to my edges and my edges said "No ma'am." They were slicked down for .00000000025 of a second and frizzed back up like I never even put anything on them. I did not let that sway me though. I tried it again. And again. And again. Finally, I got the hint that this product wasn't going to work as a gel and I banished it to the cabinet where it was out of my sight. As far as I was concerned, that product was a lie! It didn't hold a daggone thing! A sorry excuse for a gel in my opinion.

When I found the Smooth N Hold Pudding yesterday, I decided to try it again. Not as a gel, however. I decided to use it as a product for smoothing. Let me explain. Typically, when I bun, my hair as a whole has a propensity to frizz. I may be 27 (SN: My b-day was August 6th) but my hair tends to act like it did when I was 5. That doesn't work for me. I need my hair to remain smooth and sleek as I go about my day. With that said, I decided to put the Smooth N Hold pudding to the test in that capacity. Thankfully, it worked!! My hair stayed nice and smooth throughout the day. No frizz here!

So with that said, the product isn't a total fail. It can't hold anything worth a damn as a traditional gel but it does keep your style smooth and in place! I also heard that this is a great product for twists.


If you want to check it out yourself, here are a few deets:

Price:$5.97+tax for 13oz (at Walmart)

Ingredients: Aqua (Water) , Cocos Nucifera Oil (Coconut) , Paraffinum Liquidum Mineral Oil , Polyquaternium-11 , Glycerin , Sodium Cetearyl Sulfate , Cetearyl Alcohol , Polysorbate 60 , PEG-150 Stearate , Cetyl Alcohol , Ceteareth 20 , PEG-20 Hydrogenated Lanolin , PEG 40 Stearate , Aloe Barbadensis Leaf Juice , Olea Europaea Fruit Oil (Olive) , Simmondsia Chinensis Oil (Jojoba) , Persea Gratissima Oil (Avocado) , Prunus Amygdalus Dulcis Oil (Sweet Almond) , Phenyl Trimethicone , PEG-12 Dimethicone , Oleth-20 , Carbomer , Triethanolamine , DMDM Hydantoin , Methylchloroisothiazolinone , Methylisothiazolinone , Parfum (Fragrance) , Benzyl Benzoate , Citronellol , d-Limonene , Eugenol , Geraniol , Hexyl Cinnamal , Lilial , Linalool , Methyl Ionone , Blue #1 (CI 42090) , Yellow #5 (CI 19140)

Their Claims: This light weight, non-sticky product leaves a smooth and shiny hold while moisturizing the hair.
* Shines and holds the hair
* Alcohol-free formula
* Won't dry the hair or cause flaking

Monday, July 30, 2012

Ballin' on a Budget: The Hair Edition

Happy Monday lovelies!

I hope you have had a tremendous start to your week! Today I'm going to post about something that is near and dear to my heart: hair care on a budget. When you're on a hair journey, it's extremely easy to become a product junkie. I mean you want to try EVERYTHING you hear about...or read about...or everything that happens to catch your eye. Product junkie-ism wouldn't be so bad if you didn't have shampoos and conditioners that cost 30+ bucks a pop. If you're like me, paying $15 per bottle of conditioner (knowing good and hell well your hair soaks up conditioner like a sponge) every few weeks can add up quickly. Or you may be new to your journey and you're hesitant to shell out so much money for a product that you may or may not use (or like). Or, better yet, you may be a student with a limited budget but still want to take great care of your hair.

So what do you do? Can you have great hair without breaking the bank?

I say you can, you just have to know what products to look for/use. While my list is by no means complete, I have found that you can take great care of your hair with products that don't try and stick you for your paper.

For the sake of keeping this post as succinct as possible, my list is only going to cover the basics for now (Shampoo, Conditioner, Moisturizer, Styling Aids). I think budget friendly styling tools, relaxers, and all that jazz will come later.


Shampoos


Sulfate-free shampoo: Elasta QP Creme Conditioning shampoo

If you've been following this blog for awhile, you know that this shampoo is a staple of mine. Aside from being great for my hair, this shampoo doesn't break the bank. I've typically been able to find it at my local BSS and an 8oz bottle costs a little over $3 (gotta factor taxes in to it!) while a 32 oz bottle will set you back $8!!

Personally, I purchase the 32oz bottle since I can get more washes out of that bottle. One 32oz bottle lasts me at least 3 months.

Sulfate Shampoo: Silk Elements Mega Silk Neutralizing Shampoo

Yes. I know it's a neutralizing shampoo but this shampoo multitasks as a regular old sulfate shampoo as well. Let me tell you that it is a good shampoo. It left my hair feeling moisturized with having that icky stripped feel. A 16oz bottle costs between $4 and $6 (depends on if there is a sale) at Sally Beauty Supply.


Conditioners

Here is were you can break the bank if you're not careful. However there are some budget friendly, exceptionally awesome conditioners.

Light Protein DC: ORS Replenishing Pak

This is a favorite of mine. ORS Replenishing is just a perfect DC for my hair. It has the right balance of protein and moisture...and truth be told, I can go months using this as my sole DC. One pack will run you about $1.12 at Wal-Mart and depending on how your hair responds to conditioner, this may be all you need. However, I prefer to use the larger 33.8oz bottle of this product. It sets me back $15 but I get more uses out of it. You can also get a 12oz bottle for $6-$7. Whichever size you choose, it is a great DC for the price!

Moisturizing DC: ORS Hair Repair Nourishing Conditioner.

I have done a review on this condish that you can see here. If you are in need of a pure moisturizing DC, this is the one to go to! In true ORS fashion, this product is only available in pack form and costs $1.12 at Wal-Mart.

Co-Wash Conditioners: Your call

So I say your call because co-wash conditioners are supposed to be the cheap conditioners. This includes Suave, Aussie, Herbal Essences, Tresseme, VO5, etc. So ultimately, it depends on what you are willing to pay for a conditioner that you will be using (and therefore, replacing), frequently. Some of you may not mind spending $5 for cowash conditioner....some of yall might.

Suave is the biggest budget friendly co-wash with prices ranging anywhere from .99 to $2. So if you co-wash frequently, this line may be the best way to go.

My personal favorite is Herbal Essences Hello Hydration. A 23oz bottle costs $5 at Walmart but it tends to last me a while since I primarily co-wash in the summer. Another option if you co-wash a lot is the 29oz bottle of Aussie Moist. It costs anywhere between $5-$6 (depending on your location) but may be a good deal since you are able to get more washes out of it.


Moisturizer: Elasta QP Mango Butter

Another gem from the Elasta QP line. I used this at the start of the my journey but moved on to different moisturizers as I progressed. It's very thick and is more suitable for colder months (in my opinion) but a solid product nonetheless. 8oz of product will set you back $4. Not bad!

Moisturizer: Organic Root Stimulator Carrot Oil

Love love LOVE this product. It is the perfectly light moisturizer for the summer (and has no petroleum/mineral oil!! I find that it lasts for a long time however, prices vary for 6oz of product. Some places have it for $5 while others have it for $7 or $8. It really depends on where you purchase it.

Gel: Ecostyler Olive Oil Gel

Sometimes, your edges need slicking down and that's where Ecostyler gel comes in. It gives great hold without being too hard or flaky. At my BSS, 8oz of gel is only $1.49 while a larger tub cost little more than that (between $2 and $3).


Also, don't forget you can supplement your hair stash with items from your kitchen? Have some honey? Add it to your DC for an extra moisture boost! Cook with extra virgin olive oil? Use it as a pre-poo or add to your DC. Eggs can be used as a protein treatment for your hair (Ok...Ive never tried it but I have friends who have...and they got positive results). These items can give you more bang for your buck hair wise.

If you must have salon quality items, I suggest going to your local Ulta, and determining when they have liter sales. You may be able to stretch your dollars that way as well.

ETA: I also wanted to add, if you must try the more pricey lines (Qhemet Biologics, Miss Jessie's, Bee Mine, etc.), try samples first! Some sites have free samples while others have a small fee (e.g.--$5.00 for 2 oz of product), it really just depends. However, by trying samples you can determine how a product works for your hair, how long it lasts, etc without wasting a lot of money. That way, if the product is a dud, you're only out a few bucks.

What budget friendly items/lines would you add to this list? I'd love to hear from you!

Saturday, July 21, 2012

Back To Half Wigs and My Review of Outre Yasmine

Happy Saturday lovelies! I am so glad the weekend is finally here!


Anyway, last week I realized something. I am completely and utterly bored with my hair. I just wasn't having fun with it. Then it also hit me that I had been bunning consistently since March. No wonder I was bored. Doing the same thing for 4 months straight can drive anyone crazy.


So...I decided to half wig it up again. That way I can spice up my (hair) life for awhile. The first half wig I'm going to wear is Outre Yasmine. I purchased this half wig months ago (December 2011...is anyone else noticing that I have had things that I could have reviewed months ago lol) and I'm just now getting around to wearing it. I paid around $20 for it at a local beauty supply store in VA but this wig can be purchased at
blackhairspray.com.


Outre Yasmine is a synthetic half wig but I found the texture to be very soft and it is true to color ( I purchased Yasmine in 1B and it was a true 1B...not brown) The wig contains 2 combs (one in the front and one in the back) and it has a perfect fit (not too tight). In terms of length, Yasmine is long--it is BSL-ish. The style of the wig is very wavy. In fact, when I pulled Yasmine out of the package, I found that the waves are deeply set. I wasn't a fan of that (it looked too fake to me), so I brushed the wig out a bit with my wig brush to make it look a little more natural.


As par for the course with half wigs, I left a little bit of my own hair out to blend. I found that Yasmine is a very easy wig to work with. All I did was bump the ends of my leave out a bit and proceeded to blend my hair with the wig. In terms of ease of blending, this ranks up there with Outre Tammy and I would recommend this wig to first time half wig wearers.


My only gripe with Outre Yasmine is that it sheds A LOT. I know that some shedding is to be expected but it just seems like Yasmine sheds more than it should. Also, if you like big, diva hair Yasmine is not for you. Yasmine isn't as voluminous as most of the half wigs I own.

Nevertheless, Yasmine is a solid half wig and is a great style for the summer. Check out me wearing Yasmine!


Thursday, July 19, 2012

First Impressions: Qhemet Biologics Olive and Honey Hydrating Balm


Technically, this isn't a first impression sort of review. I have had Qhemet Biologics Olive and Honey Hydrating Balm since December 2011 and have been using it quite regularly. For some reason, I'm just now getting to review it.

Well better late than never, right? Let's get to the review!


Price: $16.00+ tax for 8 oz (I picked this up at Freestyle Beauty Supply in Alexandria, VA but it can be ordered online at Sage Naturalceuticals)

Ingredients: Pure grapeseed oil, pure olive oil, vegetable glycerin, vegetable emulsifier, pure wildflower honey, MSM, naturally scented

Consistency/Scent: Being that honey is an ingredient in this product, the product itself is thick and viscous. There wasn't an overpowering scent in the product that I could detect. There is a faint citrus-y/lemony scent but it's not like someone squeezed an orange into the jar


Their Claims (per the Qhemet Biologics website):

"Our pure and natural hydrating balm leaves dense, coarse and dry hair touchably soft, moist and supple."

Does not contain mineral oil, lanolin, proteins, silicones, artificial fragrances, dyes or parabens.

Has a natural, light citrus scent.


I gotta admit when I first purchased this product, I saw the word 'hydrating' and immediately thought of moisture and thought it would be a good substitute for Qhemet Biologics AOHC (see my review here). So the first way I tried to use this product was as a moisturizer. I mean, honey is a humectant right? Plus, the company claims the product is moisturizing. Well using the product as a straight out of the jar moisturizer was a complete and utter FAIL on damp,dry hair, straight hair, and not so straight hair! My had had never felt so dry! Honestly, it turned me off to the product for about a month or two.

Then I did some research and came back to it.

I found that a few people use the hydrating balm as more of a sealant than a stand alone moisturizer. So, I decided to apply Qhemet Biologics AOHC to damp hair and then apply the Olive and Honey Hydrating Balm. To my surprise, this combination leaves my hair soft and moisturized. I find that the addition of the balm allows my hair to stay moisturized until my next wash day. So,the olive and honey hydrating balm is a solid product when used in conjunction with another moisturizing product.

Also, just a general fyi, because this product is so thick you really want to take care not to use a lot of it. I think it would be easy to wind up with weighed down, sticky hair if you do. Finer haired ladies may want to skip this product as well since it can be pretty heavy.

Bottom Line: I was rather underwhelmed with the product's performance as a stand alone moisturizer and feel that it doesn't live up to its claim. Qhemet Biologics Olive and Honey Hydrating Balm is a good product in combination with a great moisturizer (whatever your moisturizer of choice may be)--making it an excellent sealant. I think it is a nice product to have but if you have a sealant that works for you, there really isn't a need to break your neck to purchase it. All and all, it's a solid product for me but isn't staple worthy.


**Please forgive the photo quality. I'm making do with the cameras I have currently**

Sunday, July 15, 2012

Sunday Chat: Paranoia...Everybody's Coming to 'Trim' Me.

Yes, we all know that trimming is good for you hair. I mean at some point you have to do it right? What good is long hair with raggedy ends?


Yeah. That's all well and good but....


I'm finding that the longer that I have been on this DIY hair care kick, the more trims terrify me. I can't tell you how many times I've logged onto LHCF and some poor soul is crying her eyes out because some stylist has hacked off all their progress. I'm not going to lie, I would kill someone dead if they thought it wise to 'trim' my progress to SL.

Trick, you weren't in the bathroom washing and DCing my hair every week (for 3 years!).


Anyway, a two weeks ago, I had gotten my hair straightened and my stylist wanted to trim my hair. Lawd, I almost fell out. I had to stress to her not to cut too much off. She said she wouldn't.

I watched her like a hawk. My ears suddenly became bionic as I began listening for the sound of too much hair being chopped off (yall know that sound). For the minute and a half it took her to trim my hair, I did not freaking breathe.

I wasn't always like this. I swear I wasn't. Shoot, I was the girl that cut her hair every 2 years just because. This hair journey is making me paranoid yall...and I can't say that it's a problem.


What are your thoughts about trimming? Does other people trimming your hair make you nervous (or makes you itch? or gives you the shakes?)

Been A Long Time.....

...I shouldn't have left you without a dope beat to step to. Step to. Step to. Step to..


How many of yall caught that song reference? Ha ha.


After well over a month of not posting, I am back lovelies! I didn't intend to stay gone for so long but between school and the general lack of give damn I had a bout my hair.....there really wasn't much for me to post. Unless you guys would have liked to hear about how I threw my hair into a lazy bun again, I think it was best for me to stay away. Anyway, this post is just to update you guys on some things that have happened during my hiatus.


---The bun challenge ended on the 1st day of summer (back in June). In terms of retention, I feel like my hair retained growth a little bit (meaning: I was more MBL instead of a little MBL) BUT between getting my hair blown out TWICE and getting a trim...yall wouldn't be able to see much of a difference. However, when I straighten my hair again or when I relax again (whichever comes first), I promise, promise, PROMISE I will thrown in the obligatory length check for you guys.


--- A few months back I posted about a Dominican salon here in Birmingham as referenced in this post. An experience happened to me there where I feel that I would be remiss if I did not share the experience with you guys. I like to give my readers as much info as I possibly can so that way, they can make their own decisions.

Anyway...

One weekend, I was feeling incredibly lazy and decided to get my hair blown out. So, I carried myself to the Dominican Salon in Homewood. This visit started routinely enough: got my hair washed, conditioned, and prepped for the blow out. There was quite a wait but I went to the salon at the height of the day so that was expected. When it was finally my turn for the blowout, I was assigned to an older woman (named Maria, I think. She is the mother of the owner) whose station was dead center. This woman, gets to work blowing out my hair. Wouldn't you know it, the woman had that hot ass blowdryer thisclose to my damn scalp! Of course it was unbelievable pain and I was flinching and crying out in pain, telling this woman not to put the blow dryer so close to my scalp. All she replied with was "Mami, it's gonna be afro if I don't. Sorry" So naturally my ass kept flinching and crying out in pain (which the stylist to my left and the another worker in the salon noted). One of the workers tried to tell chick that i'm obviously in pain. So this chick tells me to relax and close my eyes. I tell her (via a translator) that it doesn't matter if I close my eyes, if she keeps getting to close to my scalp, it will still hurt. I tried to relax but since I didn't close my eyes, chick lost her ish, slammed the blow dryer down, walked away and proceeded to talk about me in Spanish (which I understood every word. Just because I can't formulate a response in Spanish doesn't mean I don't understand). So me, the stylist to my left, and the worker that translated for me stood there looking pretty dumbfounded. I was like 'Really? Because I won't close my eyes?" I could not believe it. I was floored. I have never in all my days been witness to such unprofessionalism. I vowed never to go back. If I'm going to pay $50 for a blowout, I'm going to a salon where they are professional, speak English, and don't talk about their clients in another language (I actually have a review of a salon that I need to post).

However, if you are in the Birmingham area and still want to go to the Dominican salon in Homewood, request Josefina (sp?). That was the stylist that I had during the visit in my review of the salon. Do not, do not, DO NOT get your hair blown out by Maria (the older chick who wears glasses and occupies the center station), especially if you are natural or stretching. She will not do right by your hair. In fact, during my first visit, one client (who was natural) told me not to let that chick touch my hair because she wouldn't do right by it. I should have listened but hindsight is 20/20.

Also, just for future reference, if anyone who is blowing out your hair has to put a hot ass blowdryer that close to your scalp so 'it won't be an Afro,' they don't know what the eff they are doing. Politely get up in run from their chair.

Whooooo...I'm getting mad just thinking about that situation.

Anyway lovelies, I'm back and ready to post!

What has been new with you?

Monday, June 4, 2012

Bun Look of the Week/ Bun Idea #9: Side Bun w/ A Twist

Happy Monday lovelies!

Before you start, yes I know I have been slacking on the posting. I need to do better, I know.

Now that we got that out of the way....

I'm back this week with a bun style that I wore last week: a side bun with a twist. It is very similar to the Double Twist Bun I posted except that there is only one twist and the bun is to the side. This bun is super easy to do and I prefer to do it on damp hair. Basically, you make your twist on your desired side and twist your hair to the opposite side. You then take a hair tie and gather your hair into a [rockin'] side ponytail. To make the bun, you divide the ponytail into 2 halves, twist one half clockwise (and secure with bobby pins), and twist the other half counterclockwise. Boom. You're finished.


I think this is a great style for ladies who are APL and beyond. Although, SL may be able to swing it as well (instead of twisting the bun they may have to wrap it to make the bun look full).


Check it out:


Also, we are in the final days of the bun challenge (it will be ending on the 1st day of summer). How have you been doing with the challenge? Are you bored with buns yet? Or do you have some great bun ideas for the upcoming summer months?

Wednesday, May 23, 2012

Bun Look of the Week/Bun Idea #8: Top Knot Bun


Happy Hump Day lovelies!

I'm back with the bun I'm rocking for this week! I'm kinda in a lazy mood with my hair and my bun reflects that. The bun I'm wearing is a top knot bun. A top knot bun is a type of high bun and it's different from the ballerina bun I wore a few weeks back in that the bun isn't a perfect, circular bun-so to speak. Instead, the 'bun' literally looks like a knot on the top of your head.

The top knot bun is my go to bun (I've mentioned this bun before AGES ago on my blog! I clearly still love it!). It takes maybe 2 minutes to do and all you need is a hair tie and a few bobby pins ( or a single spin pin). It keeps your hair of your neck, it's super easy, and makes you looked pulled together in a matter of minutes! I freaking : heart : that bun.

This bun can be done on air dried, blow dried, or even damp hair. You simply gather your hair into a high ponytail, form your hair into a 'knot', and secure with bobby pins. Boom. Done. You can make it an extreme top knot by making your ponytail super high and your knot super tight. However, I prefer a looser knot and I prefer for my ponytail not to be directly on top of my head. A tight knot just looks weird to me. Lawd, I'm rambling. Anyway, I think it is a great style for ladies who are SL and beyond.


Check it out:


Sunday, May 20, 2012

Sunday Chat: Are Stylists Necessary for a Successful Hair Journey?

Happy Sunday lovelies!

I’ve decided to add a new feature to The Awkward Stage. I have random thoughts about hair that I never really post on here. That’s about to change. Starting today (and every Sunday until I run out of things to talk about lol), I will post a topic for discussion, my thoughts about it, and then open the floor up for you to share your opinions. Ok?

Molto bene.

Something that I have noticed, from folks who are transitioning to those who are relaxed is that some people feel that their success in handling their hair can be best met by stylist. These people are depending on stylists for not only hair styles but product recommendations and the like. There is a part of me that wants to say that this isn’t the way to go. Don’t get me wrong. Some people out there have excellent stylists who use healthy hair practices and all that jazz. The vast majority, however, do not. For that reason, I find it problematic to put your hair journey in the hands of someone else.

I have 2 reasons for that:
1). Stylists are taught how to style. Most stylists can get your hair into a fierce ‘do. But then what? How do you take care of your hair after that? What products are good for your hair? How many stylists have relaxed your hair into oblivion ( I speak from experience on this one. Once upon a time, I was told to relax my hair every 4 weeks b/c of the ‘grade’ of hair I have :serious side eye: ) ? I know most of yall have had an experience where your hair came out looking so good but you have no idea what products they used because the stylist put them in a nondescript bottle. Others may tell you that in order to keep your hair looking good, you need to come to them every 2 weeks. Whatever they may tell you, it doesn’t help you and it makes you dependent on them. Which brings me to my next point……

2) It fosters dependency. As someone who has moved all of her life, I know what it’s like to have a stylist, move, and then feel lost because you have no idea what to do with your hair. You don’t know how to style it and you feel a hot mess until you find a stylist that meets your expectations. It’s rough, I know. However, ever since I have been on this hair journey, I feel confident in my own ability to take care of my hair. I know what products work for it, I know how to style it for any occasion (whether or not I feel like it is another story entirely lol), I can relax it, etc. Anything I need to do to my hair, I can do and I take great pride in that. I just think that every woman should have some base idea as to what to do with their hair. That’s my personal opinion though.

What do you think about using stylists on your healthy hair journey? Are they necessary?

Friday, May 18, 2012

Bun Look of the Week/ Bun Idea #7: Double Twist Bun

Happy Friday lovelies!!!

TGIF!!! I hope all of you are having an excellent Friday. It has been a long week and it is time to cut loose! Wooooo! : celebratory wops:

Anyway, I just wanted to stop by with the bun look I have been rocking this week. I was partly inspired by Whitley Gilbert's hair in 'A Different World' (don't judge me. I've been watching it every day this week. See the vid clip here) and my mom. My mom was in the military so she was protective styling before I even knew to call it that. The style that I'm wearing is something that she would wear quite a bit.

The double twist bun is a super easy and super summery bun to wear. It doesn't require you to flat twist your hair or anything like that. You just...twist it. Not the most descriptive term I know but that's what it is! Basically, you part your hair (straight down the middle, slanted...whatever) so that you have 2 sections of hair. You then take a hair tie and tie up one of the sections so that it's out of the way. Next, you twist the hair that is left out. When you're done twisting, you put that hair up into a bun (secure it with bobby pins). Once that's done, you then twist the other side of the hair. When you're done twisting, you wrap the hair around the existing bun, secure with bobby pins, and boom! You're done! Now if that sounds a little too complicated, there is an excellent tutorial on the CuteGirlsHairstyles page on Youtube. You can see the vid here
.


I think this would be a great hairstyle for those who are SL and beyond. I also prefer to do this style on wet hair. I just think it looks more put together that way. However, it can most certainly be done on dry hair as well.


Check it out!